Experiments in the Darkroom
In our first Darkroom experiments, we used medium format negatives. We used the enlargers in the darkroom to enlarge the negatives and print them on large pieces of fibre based Photographic paper, and then develop the prints ourselves. However, we manipulated the negatives and images in various ways, with mixed results.
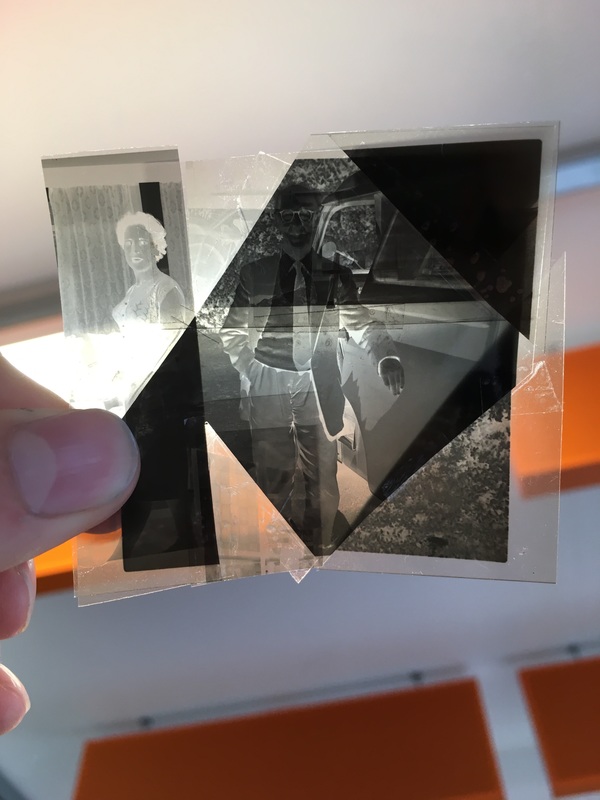
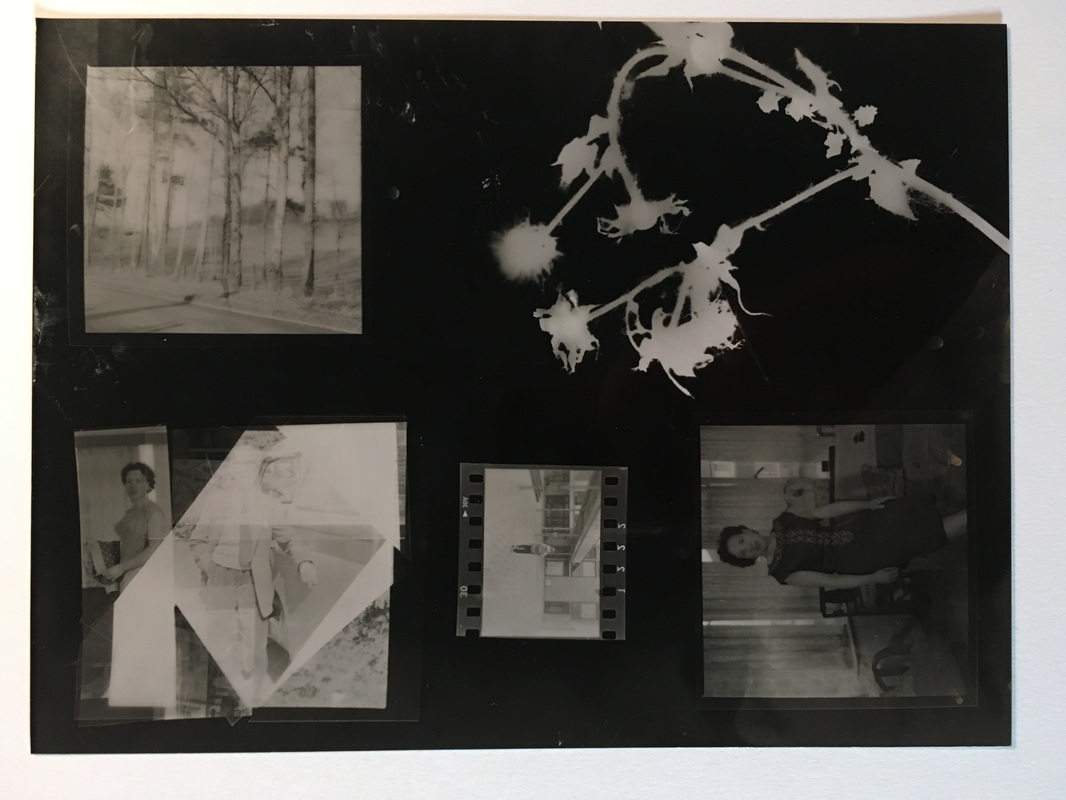
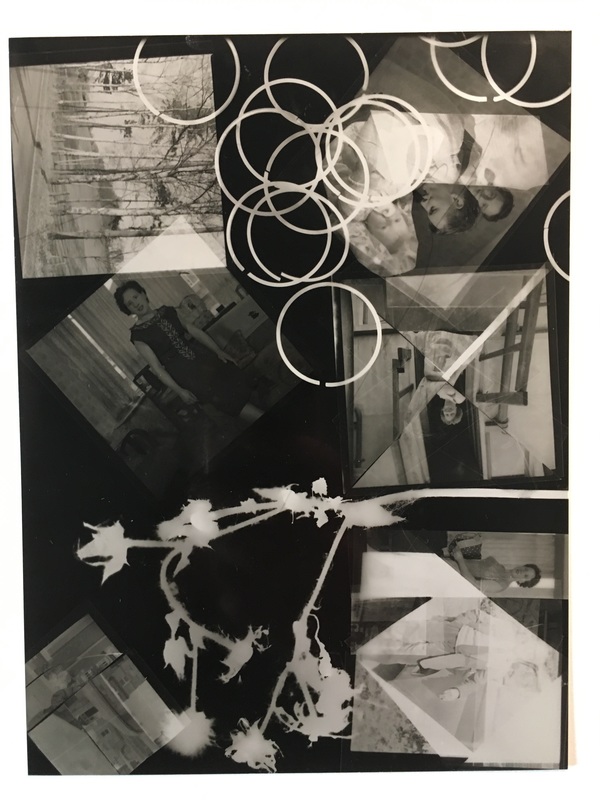
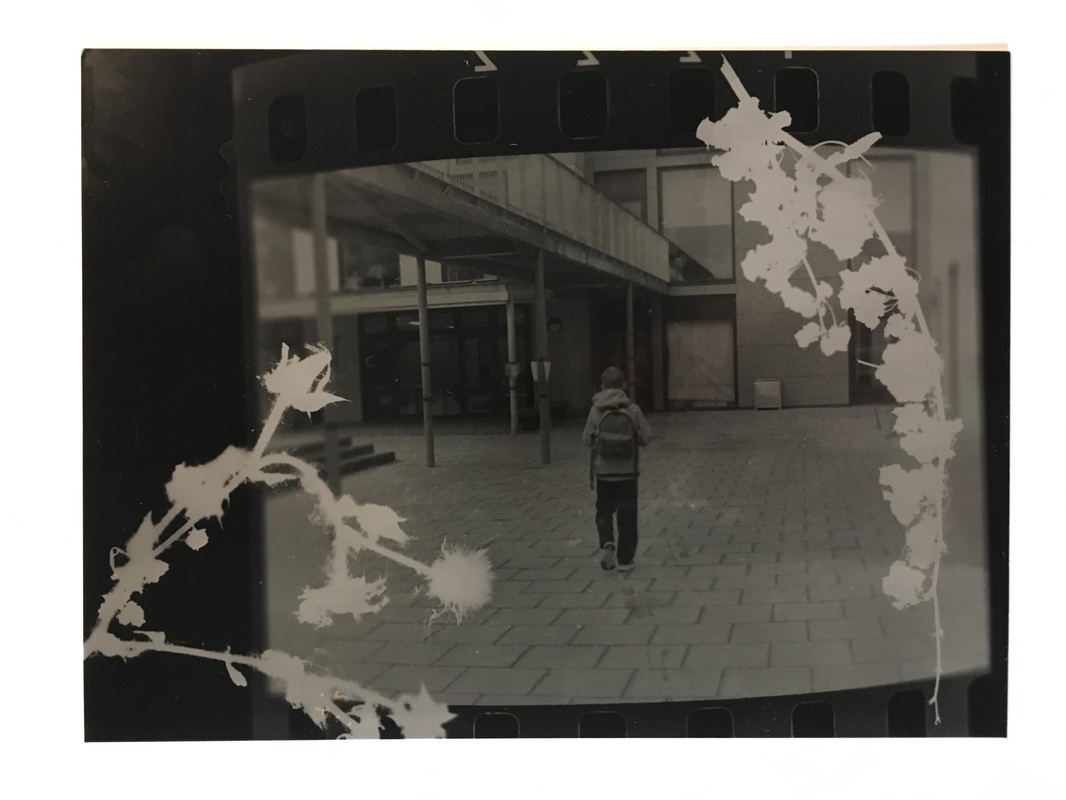
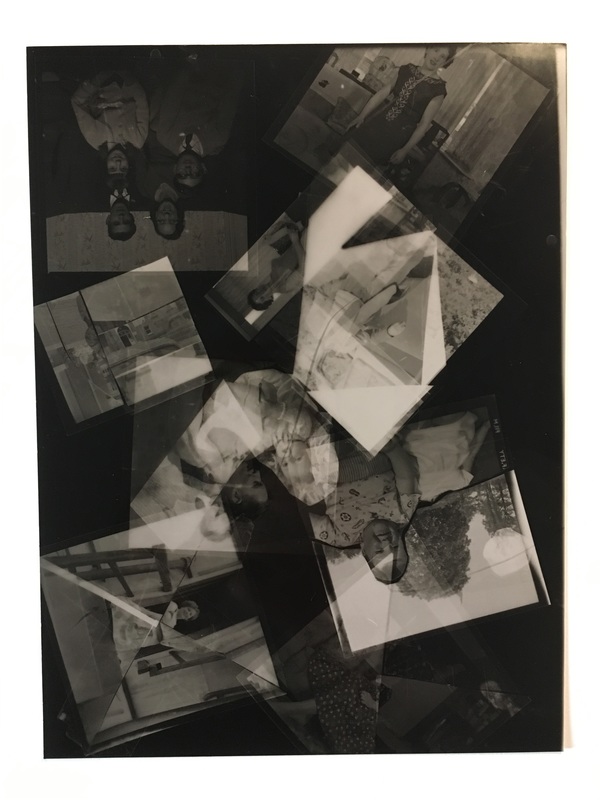
Firstly, we cut up the negatives and rearranged the different pieces, taping the various pieces together to create unusual, abstracted collages. Secondly, we cut circles out of large sheets of cartridge paper, so we could use these like large masks during the enlarging process. We also used paper circles and shapes, which we could overlay on top of the photographic paper and create some interesting shapes on the print.
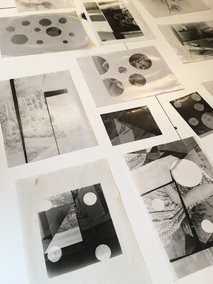
< Many different prints that were created by the class
Firstly, we cut up the negatives and rearranged the different pieces, taping the various pieces together to create unusual, abstracted collages. Secondly, we cut circles out of large sheets of cartridge paper, so we could use these like large masks during the enlarging process. We also used paper circles and shapes, which we could overlay on top of the photographic paper and create some interesting shapes on the print.
< Many different prints that were created by the class
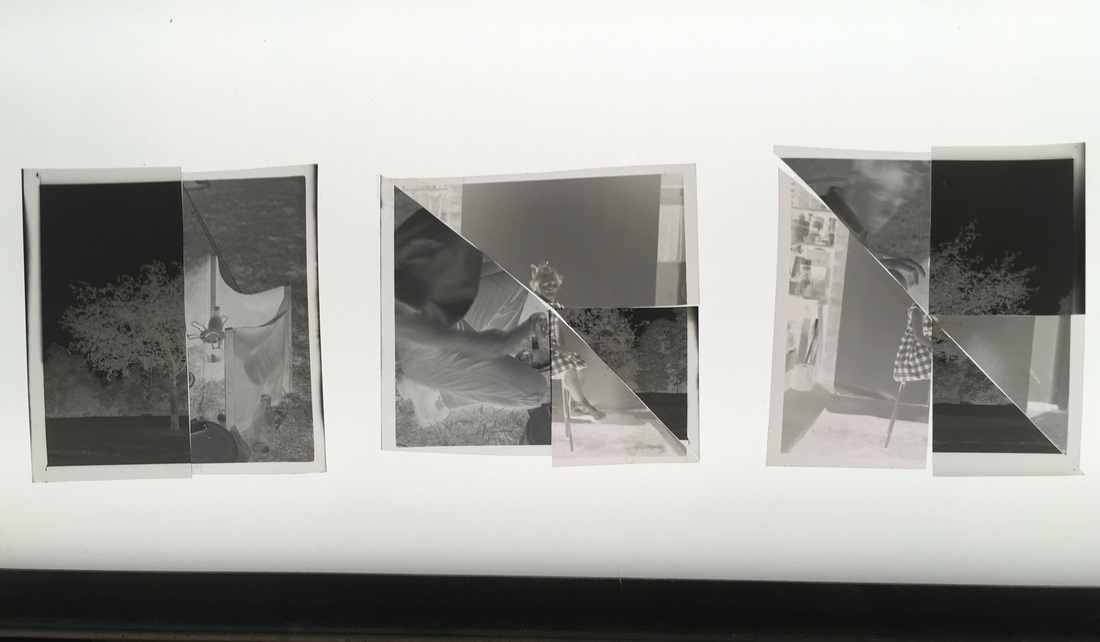
We chose various negatives that interested us from the lightbox, and began to rearrange them. We cut up the negatives and reassembled the various pieces in many different ways, with different pieces overlapping and joining. Often there were unexpected results and I created some interesting prints that I didn't anticipate when I was arranging the various objects and placing the negatives in the enlarger.
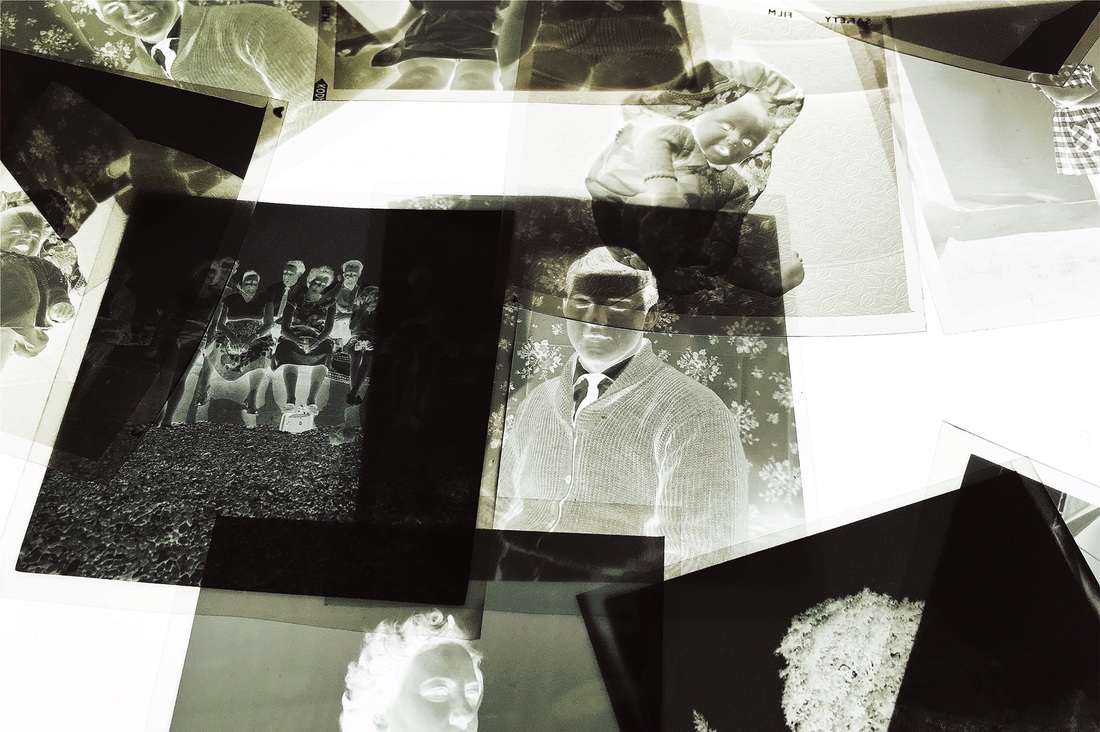
Here are the prints that I created:
Here are the prints that I created:
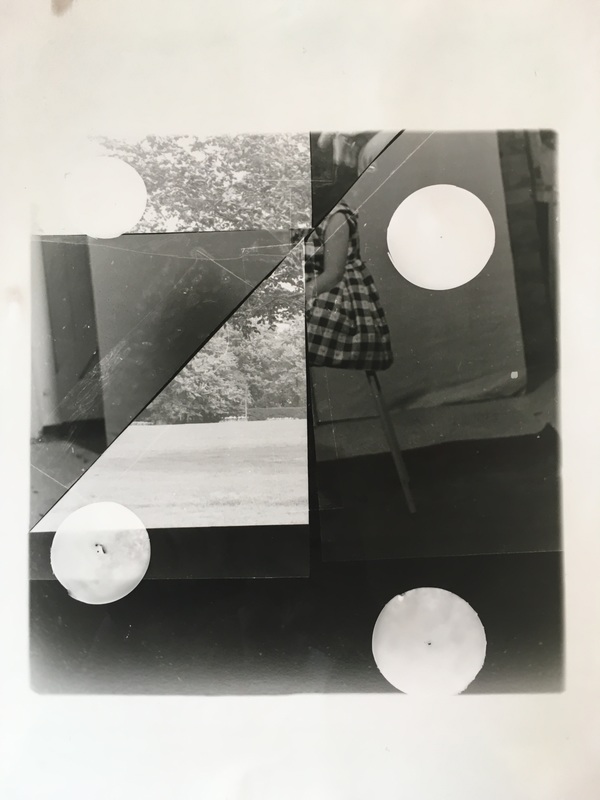
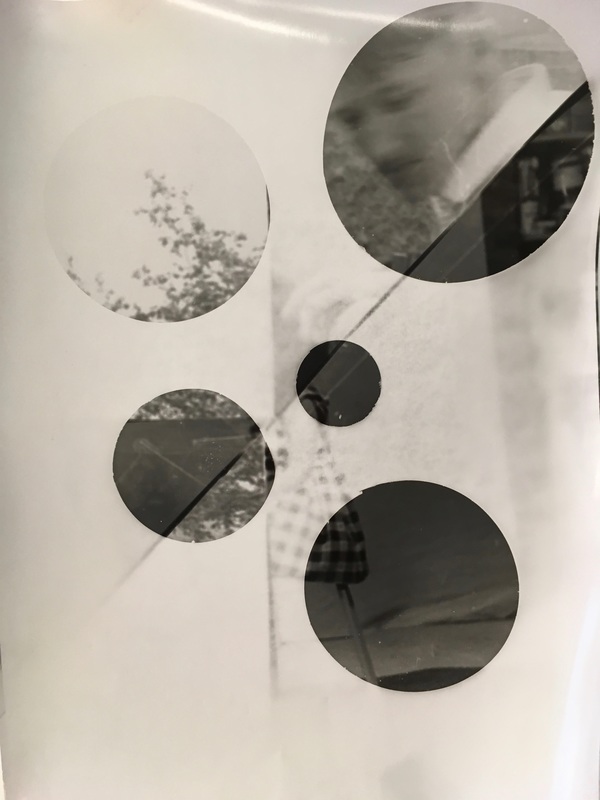
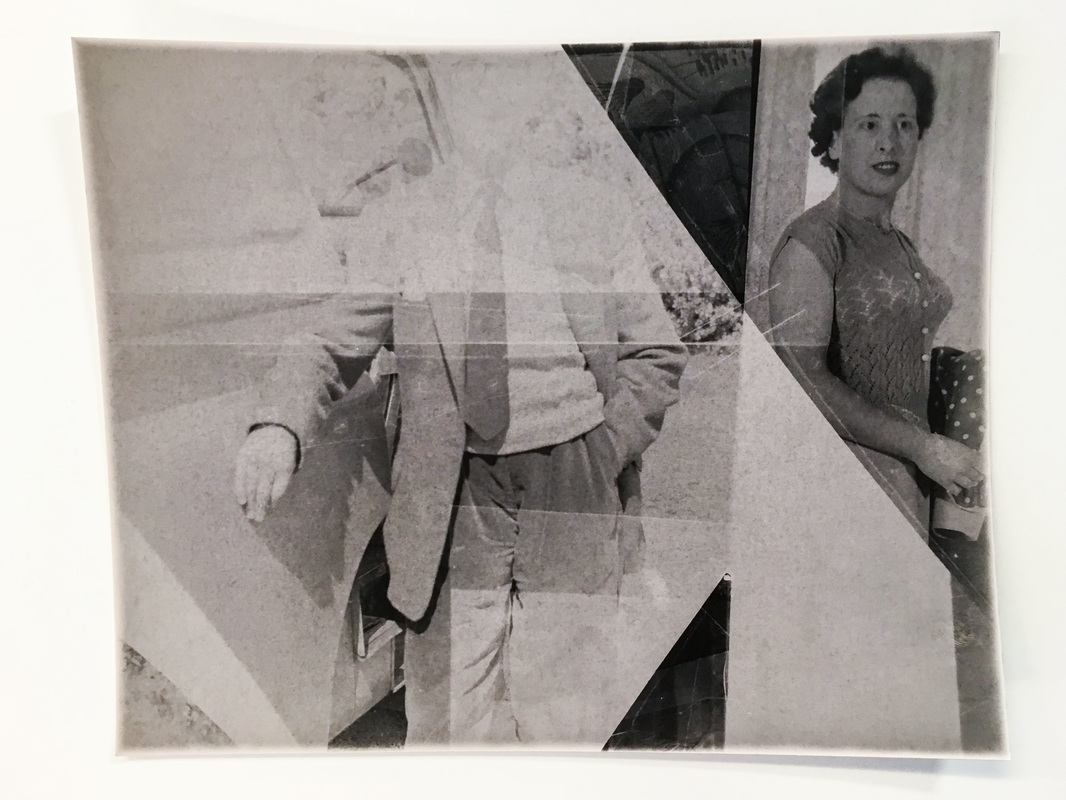
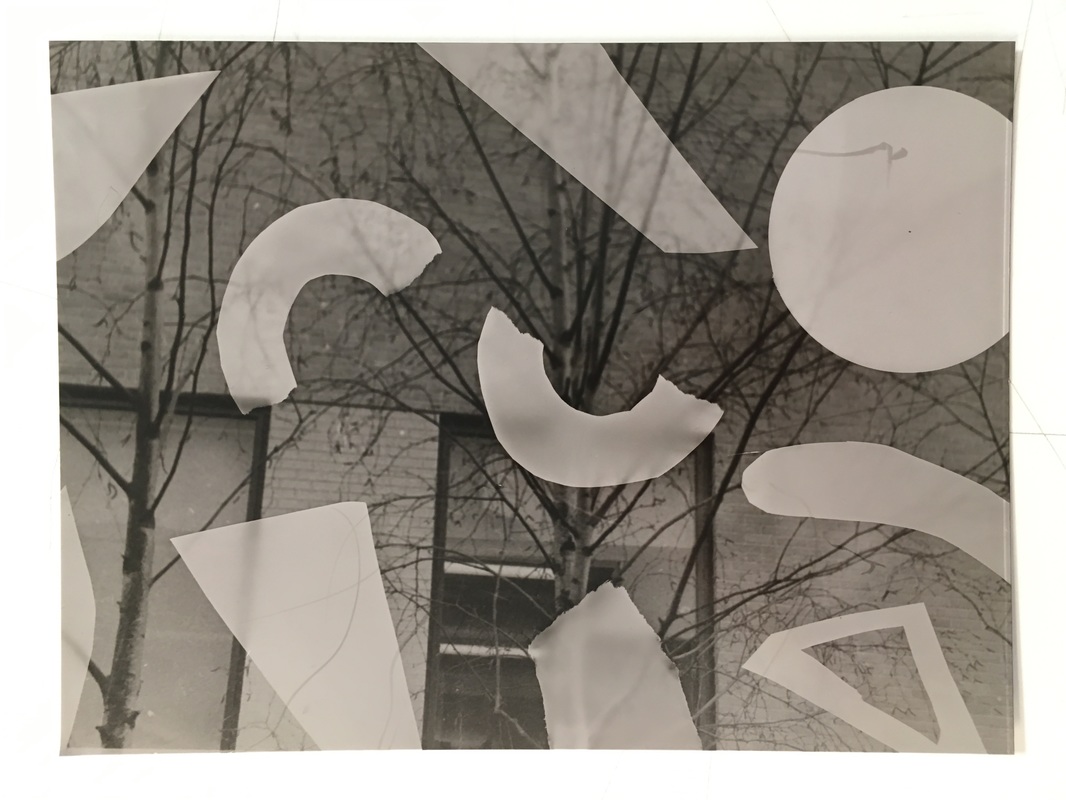
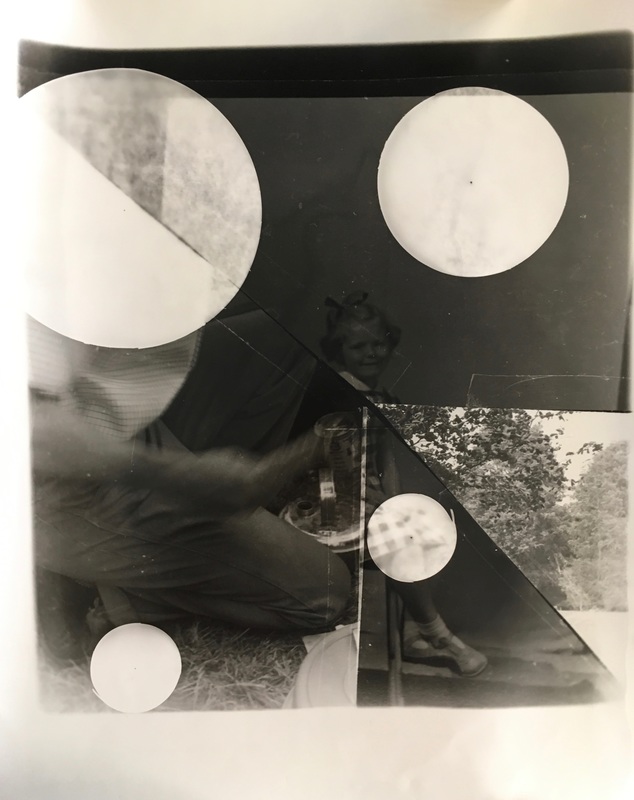
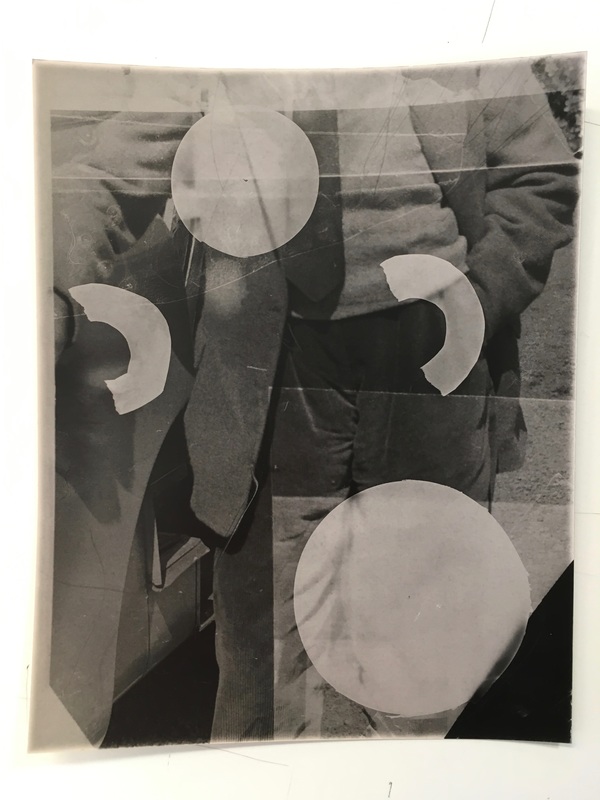
Overall, I really enjoyed process of working and creating new prints in the darkroom. As well as this, I am happy with the results of some of my prints. I think that the manipulated and collaged negatives made some really interesting, abstracted effects on the prints that I created - with some quite unexpected results. Also, I like the different shapes (created by overlaying paper shapes on the photographic paper) against the abstracted collages/manipulations. I think that these prints were quite successful overall, as the prints were generally correctly exposed - with some potentially slightly brighter or darker than I was aiming for.
Experimenting with different exposure times at various apertures was good to help understand how much light we needed to expose our prints. As well as this, I could experiment with how varying densities (or how dark certain areas of a negative were) produced different effects. For example, on the print (in the top right of my gallery above) the lighter areas were made by overlaying parts of the negative, meaning less light passed through this area and underexposed these sections. whereas the darker and correctly exposed areas were only one layer of a negative thick, meaning that they allowed more light to pass through these areas and either correctly expose or overexposed (darker) these areas. Experimenting and doing this particularly helped me to understand how negatives work.
Experimenting with different exposure times at various apertures was good to help understand how much light we needed to expose our prints. As well as this, I could experiment with how varying densities (or how dark certain areas of a negative were) produced different effects. For example, on the print (in the top right of my gallery above) the lighter areas were made by overlaying parts of the negative, meaning less light passed through this area and underexposed these sections. whereas the darker and correctly exposed areas were only one layer of a negative thick, meaning that they allowed more light to pass through these areas and either correctly expose or overexposed (darker) these areas. Experimenting and doing this particularly helped me to understand how negatives work.
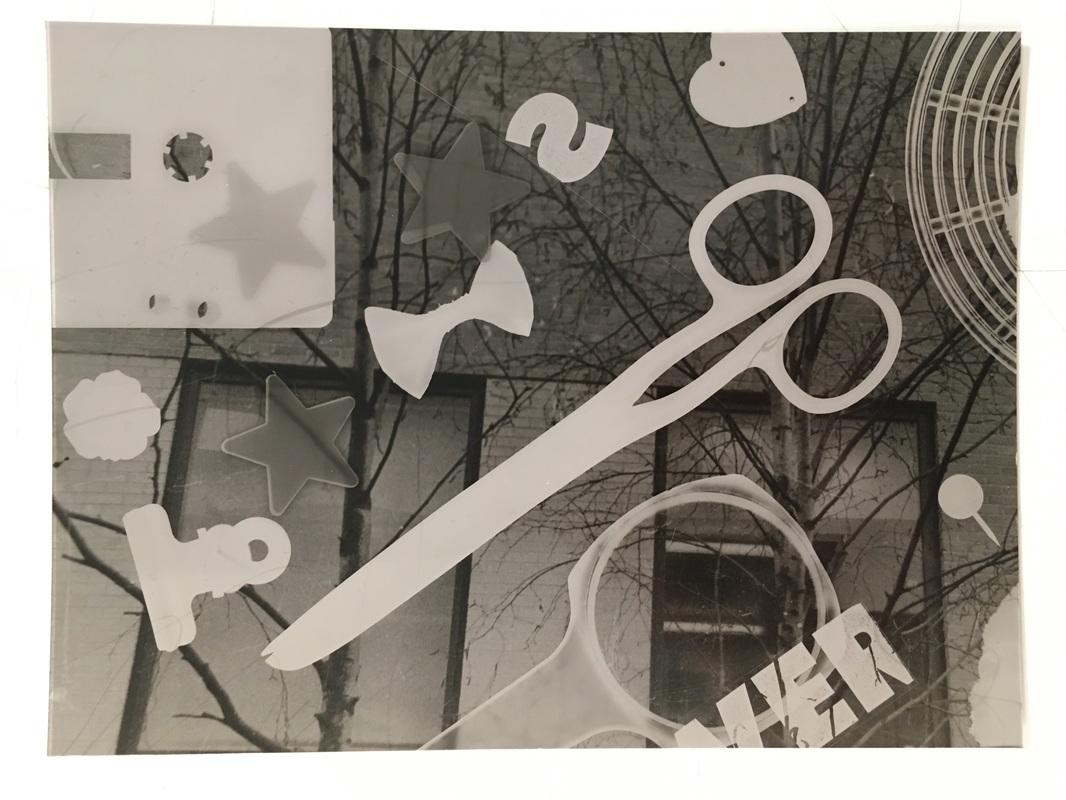
Photograms
What are Photograms?
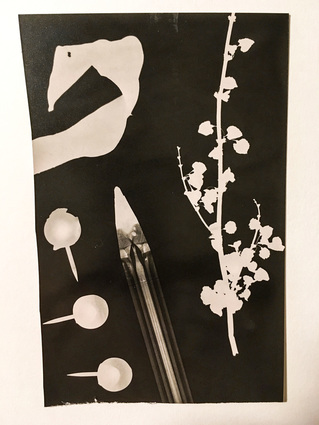
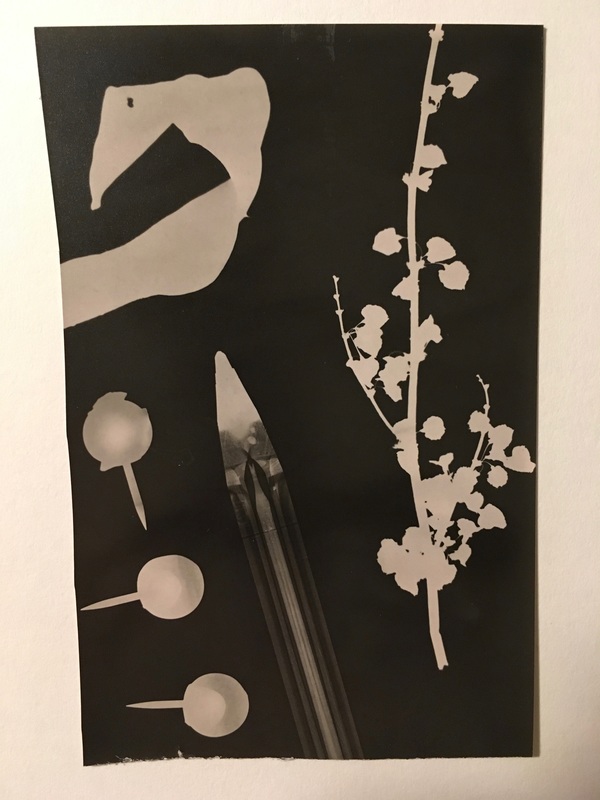
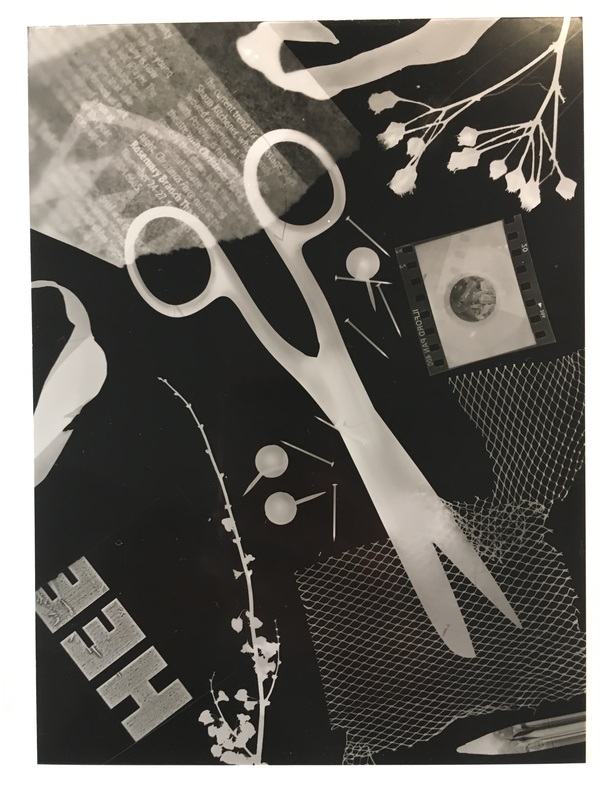
A Photogram is an image made without a camera, but using photographic materials. Photograms are created by placing objects on photosensitive paper, and exposing the paper to light. This creates a negative image of the various objects (depending on how dense or opaque the objects are) on the sheet of photographic paper.
|
Method Used:
1. I took a sheet of fibre based photographic paper and placed it under the medium format enlarger (With the enlarger switched off). 2. With the red safety filter on, I turned on the enlarger's light. The red safelight stops the photographic paper from being exposed. 3. I adjusted the aperture; I used quite a wide aperture (f2.8) so that more light would hit the photographic paper, meaning that I would only need quite a short exposure. I focused the light with the dial on the right hand side (so that it was sharply focused). 4. I arranged the different objects on top of the photographic paper, and adjusted the composition. 5. After I was happy with the composition, I removed the safety filter for two seconds to expose the photographic sheet (after previous experiments, 2 second exposures at f2.8 gave the best results) 6. I then took the photographic sheet to the sink area to develop the sheet. 7. I submerged the sheet in the developer until the shapes were well defined, I then placed the sheet in the 'stop' (to rinse off the developer) and then the 'fix' (to fix the print) 8. I then rinsed the sheet with water and hung it up to dry. |
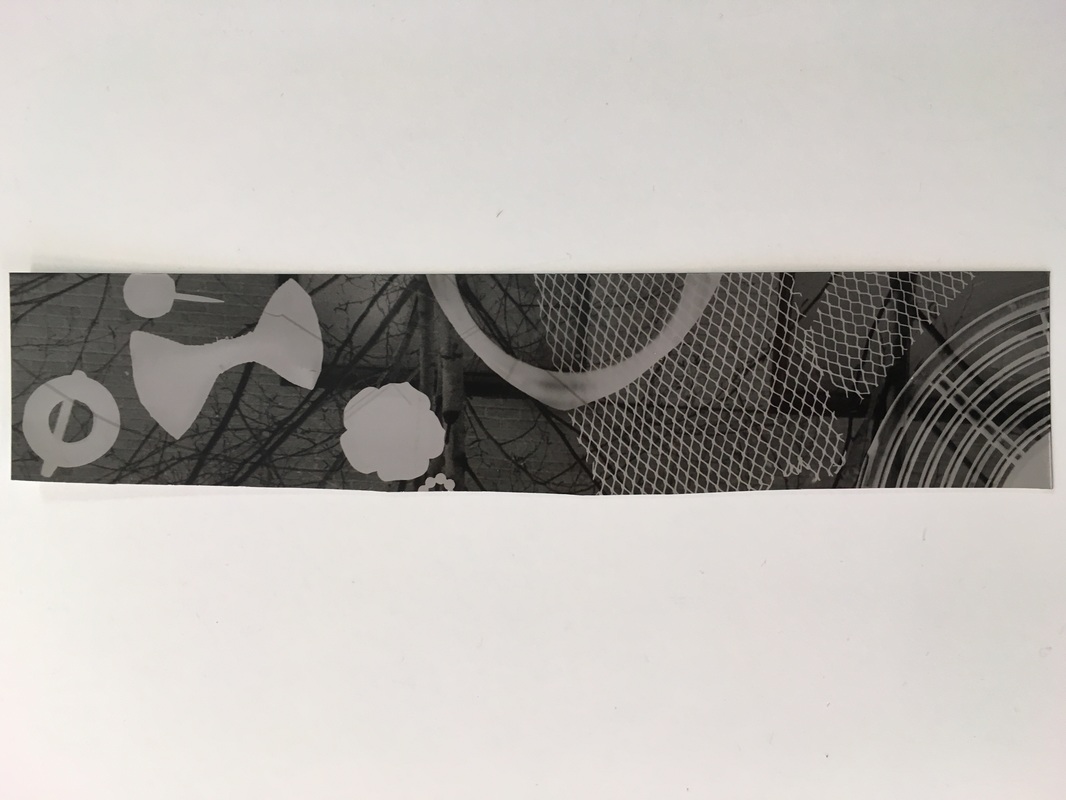
Photogram test strip
|
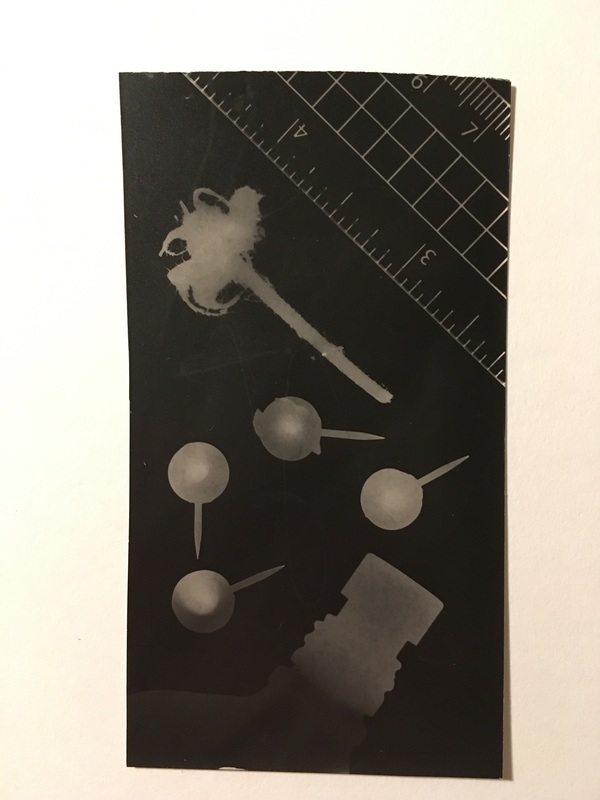
What materials work best?
I found that materials that had interesting and well defined shapes worked best. If you want to create a well defined, white contrasting shape, an opaque object (such as a pair of metal scissors) works well - as the light cannot pass through the solid object, creating a defined outline. Translucent (semi transparent) objects can create some interesting effects, such as a thin sheet of newspaper, as the text was pretty well defined on the photographic sheet. The light can pass through the translucent objects partially, meaning darker details often come out on the print.
Transparent objects (that allow light to pass through them) often don't work as well. This is because the light wouldn't be blocked, and would pass through the object - often without creating any interesting effects. However, a form of shaped glass (such as a glass jar) with has different curves and varying densities of glass can block the light in some places and create some unusual shapes.
Transparent objects (that allow light to pass through them) often don't work as well. This is because the light wouldn't be blocked, and would pass through the object - often without creating any interesting effects. However, a form of shaped glass (such as a glass jar) with has different curves and varying densities of glass can block the light in some places and create some unusual shapes.
